How to Change Your DNS Settings on a Mac
How to Change Your DNS Server on a Mac
To change your DNS server on a Mac, go to System Preferences > Network. Then select a connection and click Advanced. Next, select the DNS tab and click the plus sign. Finally, enter a DNS address and click OK > Apply.
- Click the Apple icon in the top-left corner of your Mac’s screen.
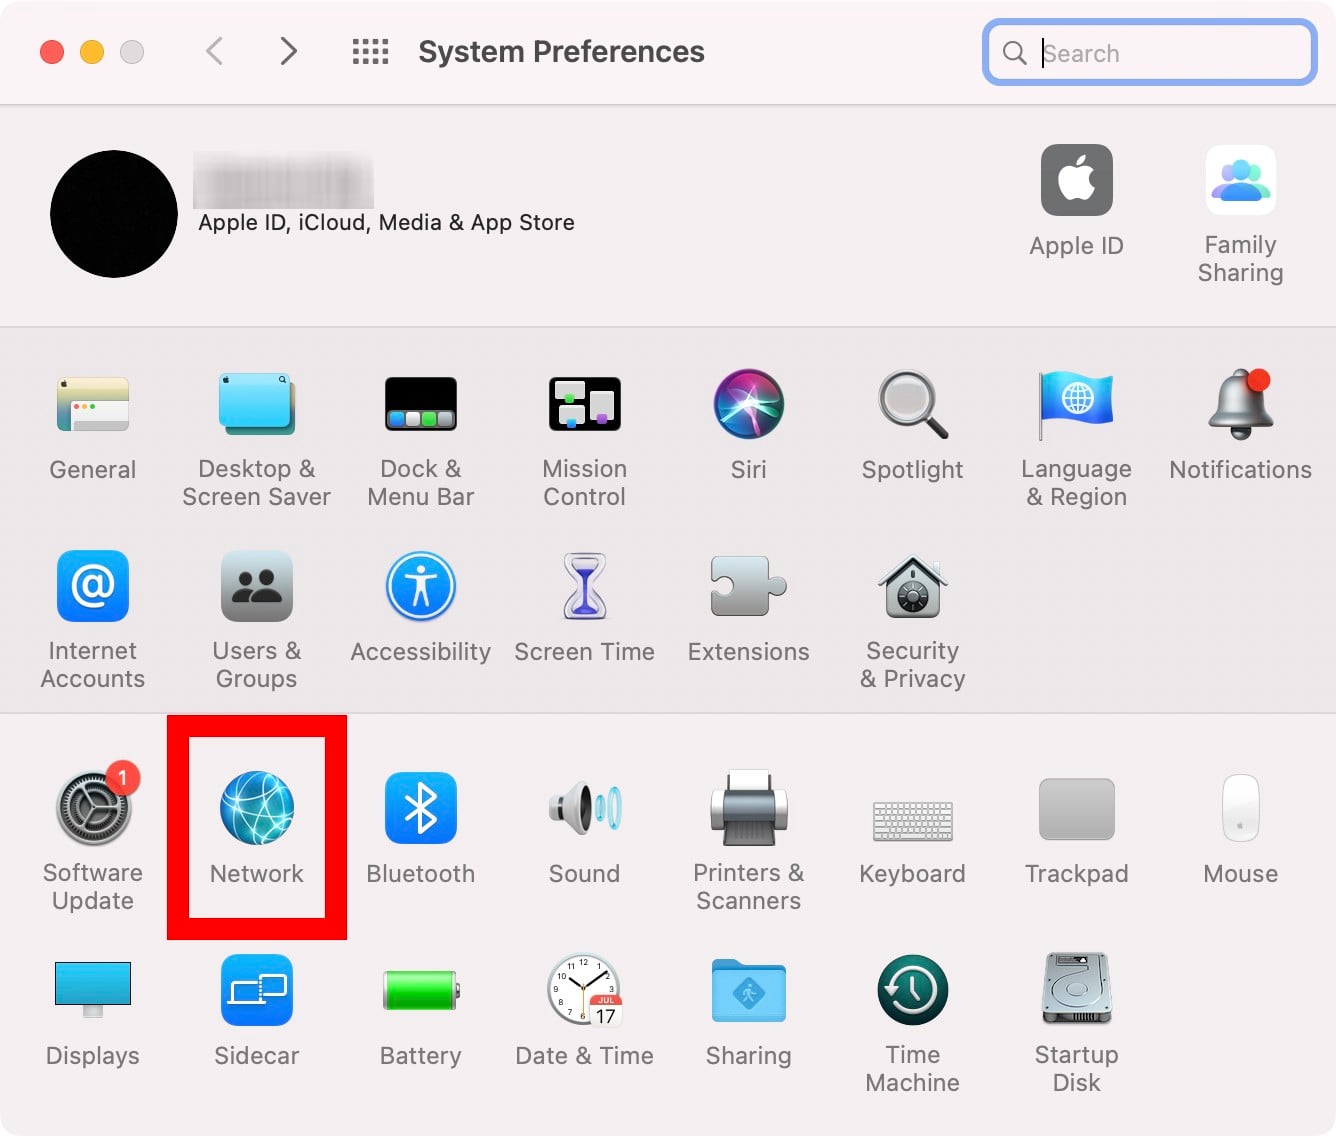
- Then select System Preferences.

- Next, select Network.
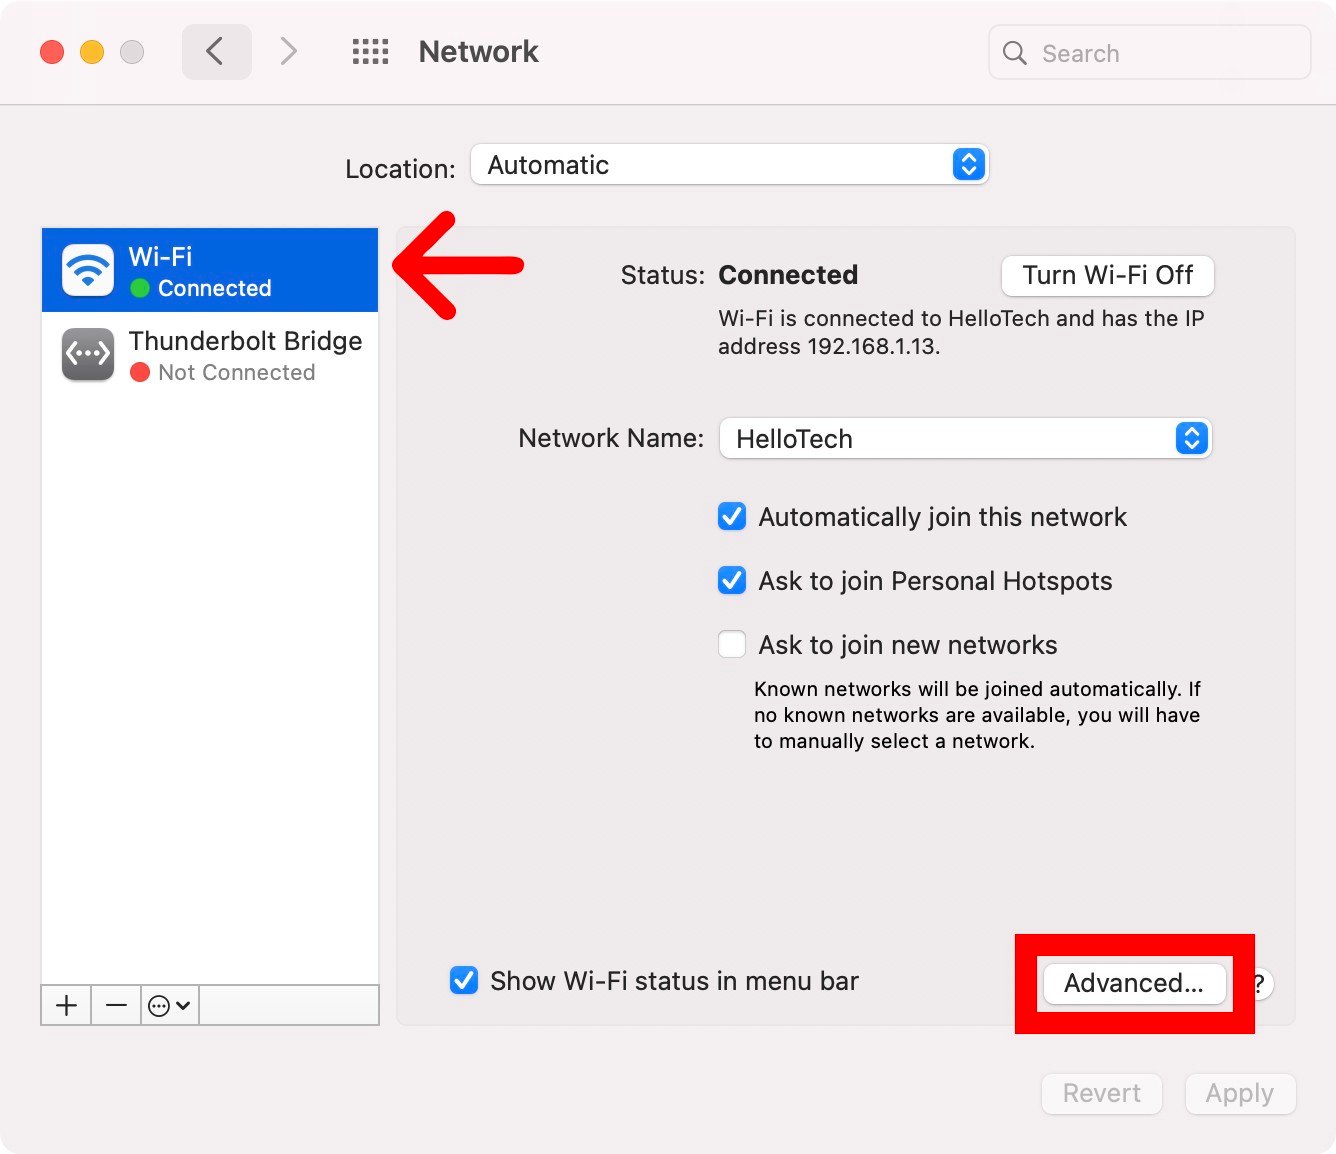
- Then select the connection that you want to change DNS server for. You will see all your different network connections in the left sidebar. You will know which connections you are currently using because they will have a green circle, while the connections you are not using will have a red circle.
- Then click on Advanced. You will see this in the bottom-right corner of the window.
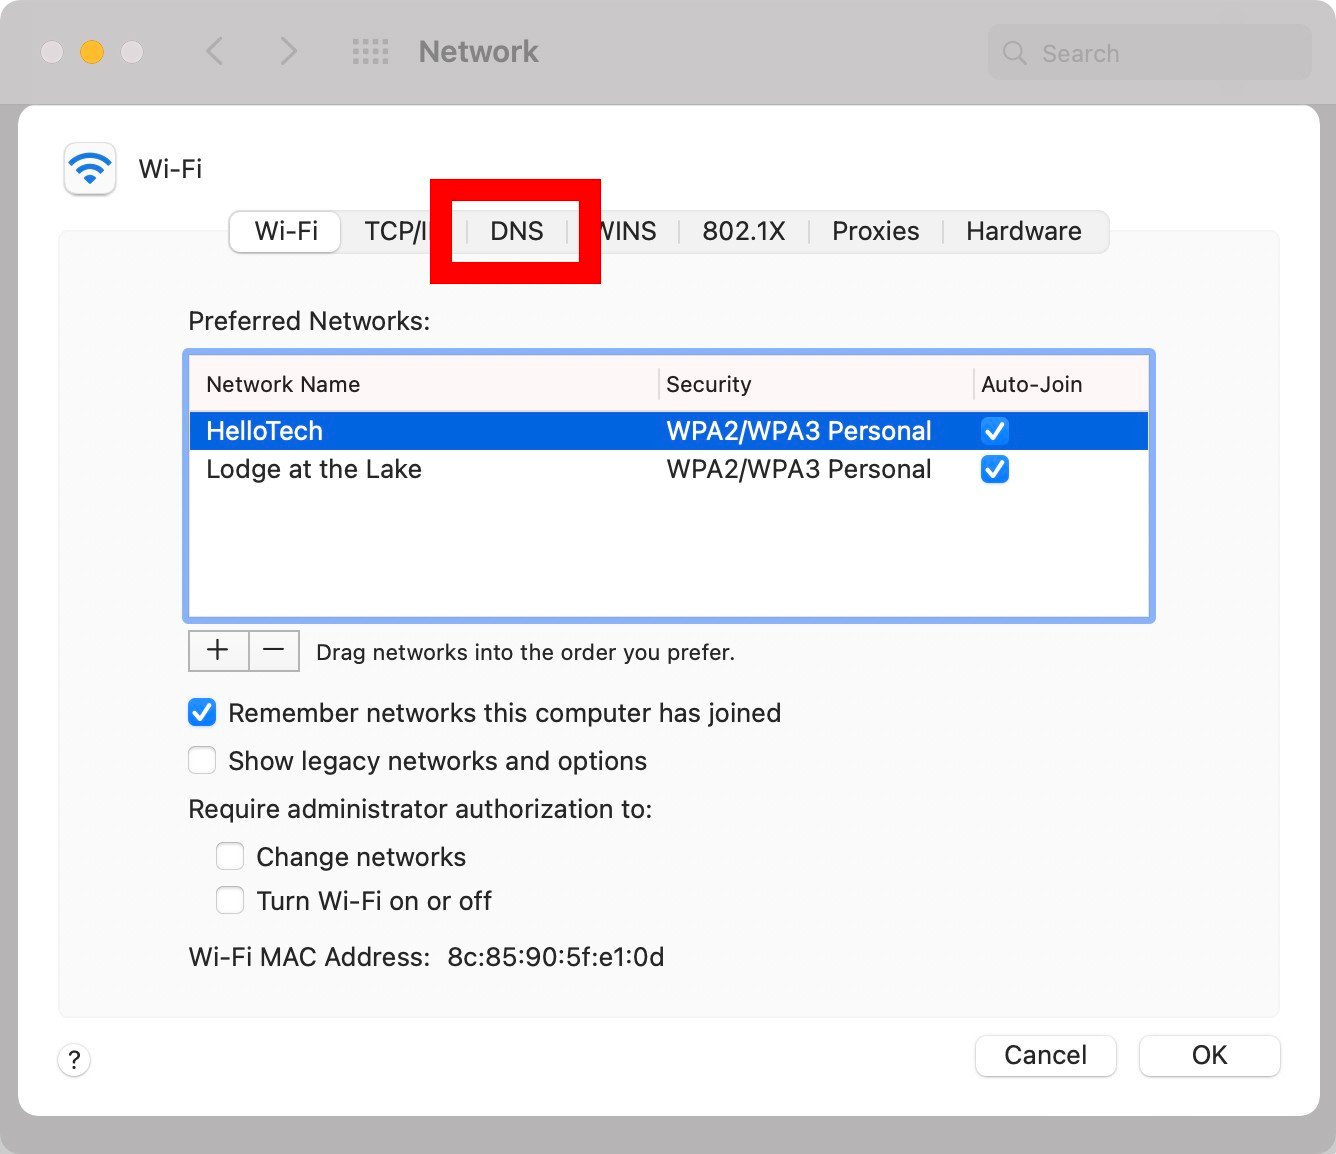
- Next, click on the DNS tab. You will see this at the top of the window.
- Then click on the plus icon (+). You will see this at the bottom of the DNS Servers pane.
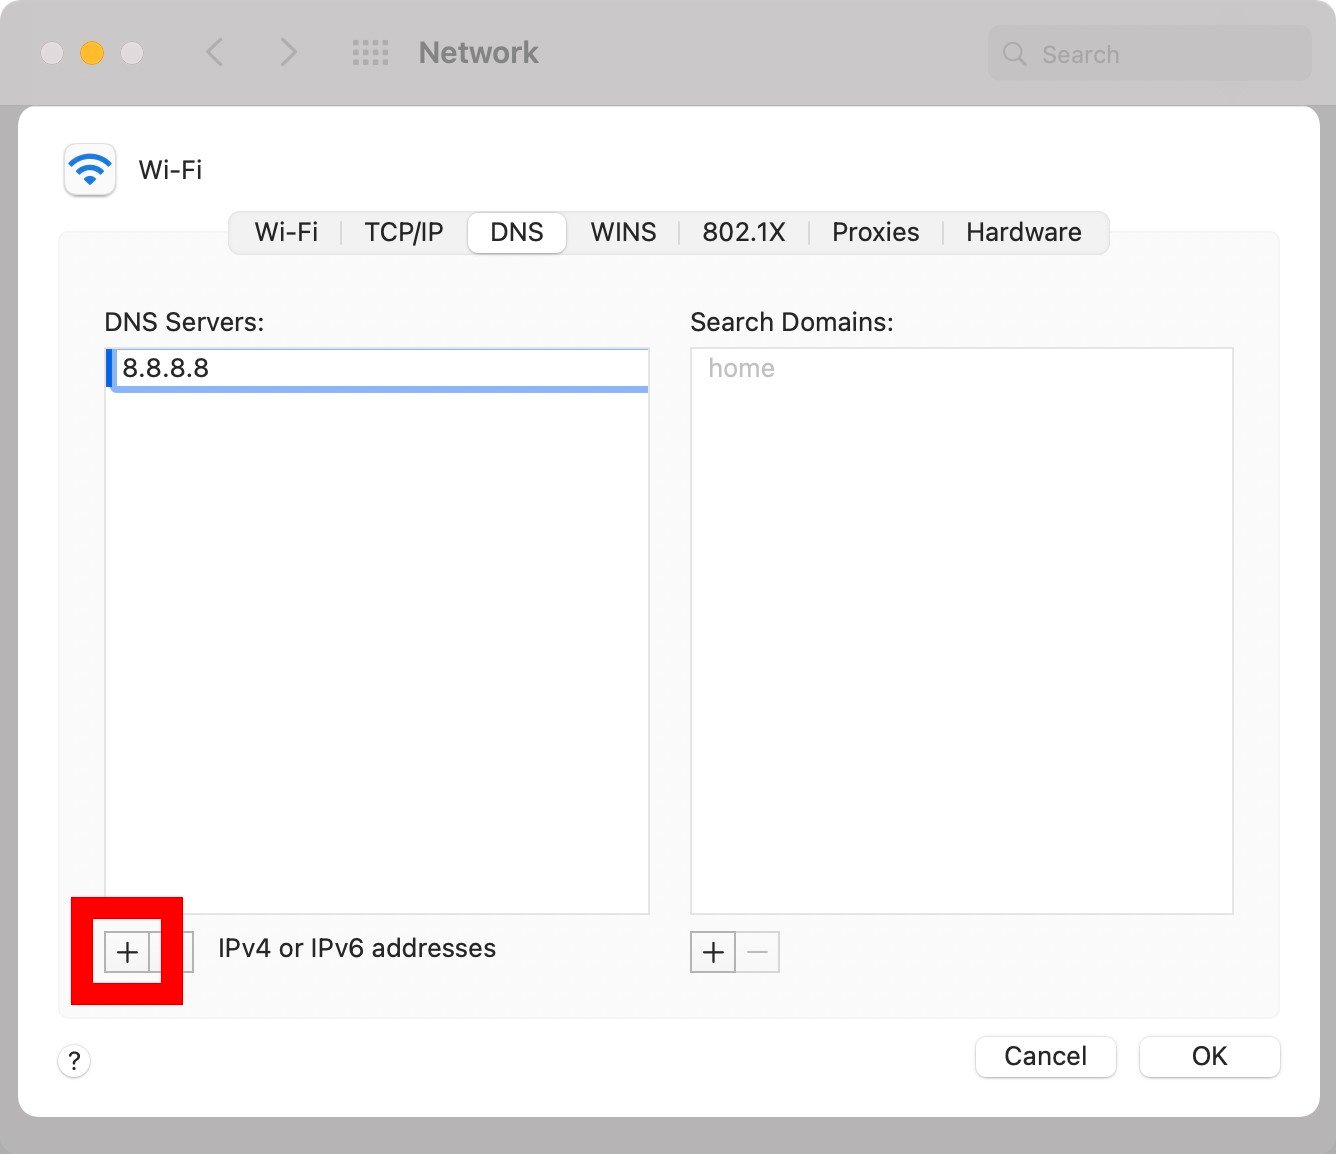
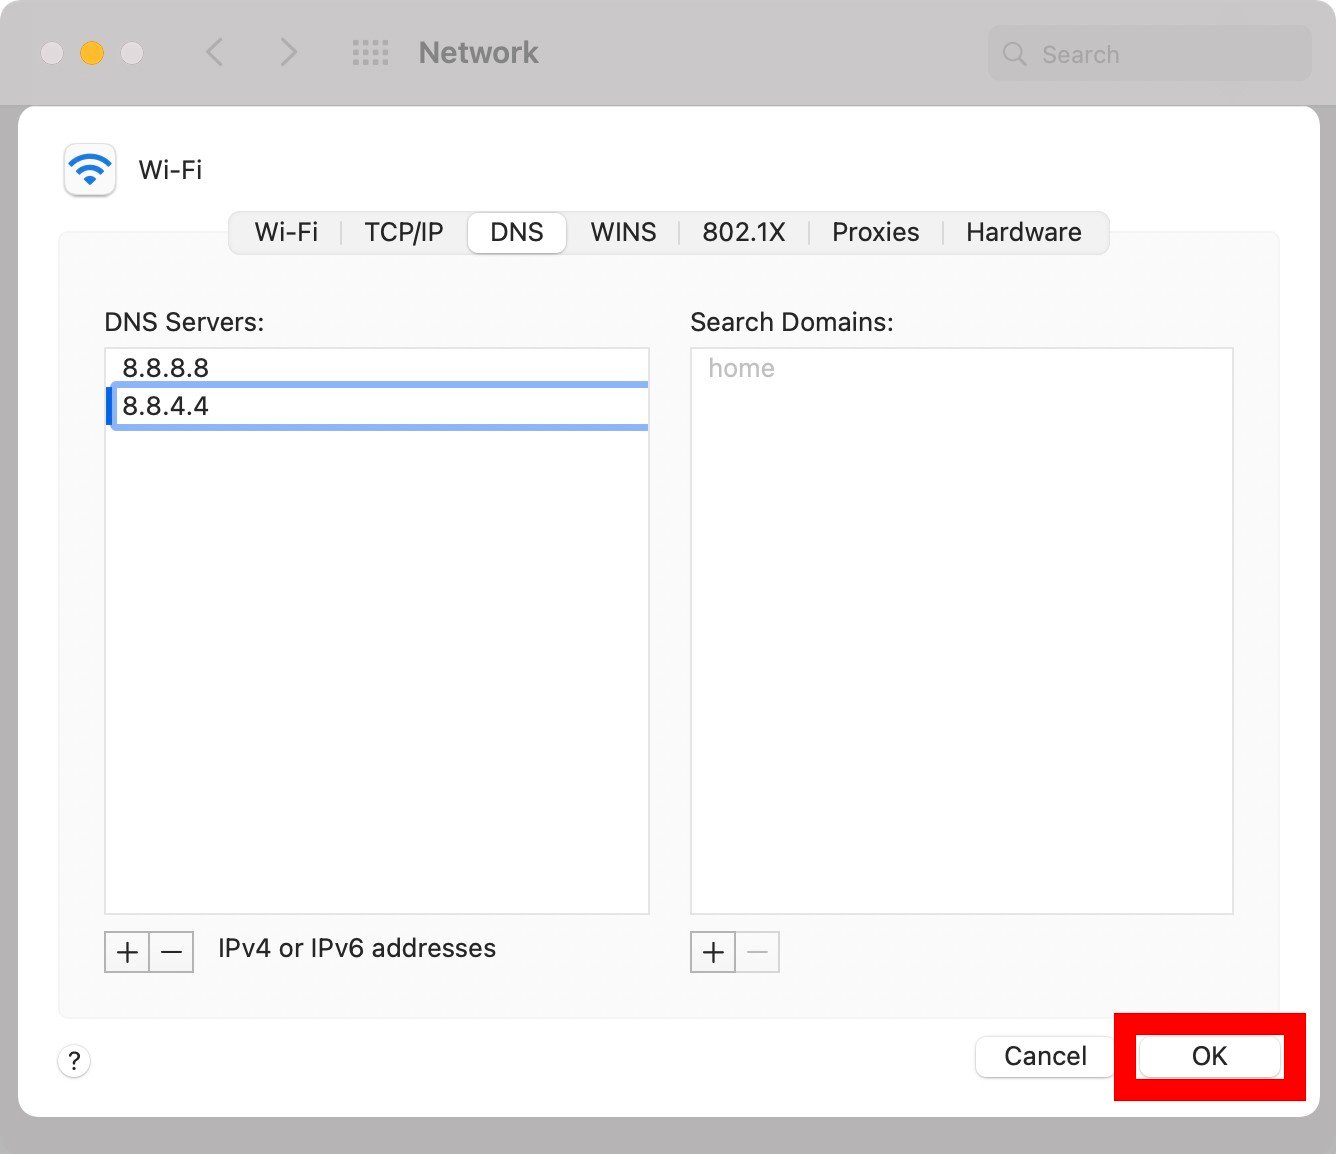
- Then enter new DNS addresses. You will want to enter a primary and secondary DNS address. When a URL needs to be resolved, your Mac will query the first entry on your DNS server list. If no response is received, it will move on to the next entry. This will go on and on until a response is received or when all servers have been queried.
- Next, click OK. The Advanced window will close, and you will be brought back to the Network window.
- Finally, click on Apply. Your changes won’t go into effect until you click Apply in the Network window.

Now that you know how to change your DNS address on a Windows 10 and Mac computer, here are the best third-party DNS addresses you can use.
Related Articles
How to Change Your DNS Settings on Windows 10
How to Change Your DNS Server on Windows 10 and Mac Changing the default DNS settings on your computer can improve your online privacy, security, and browsing speed. If you’re a parent, changing your DNS server can also block your children from ...How to Forget a WiFi Network on a Mac
How to Forget a WiFi Network on a Mac These days, your computer remembers your WiFi passwords and automatically signs you in whenever you are in range. This can save a lot of time, but it can be annoying if you keep getting signed into the wrong WiFi ...How To Change Your WIFI Password
Finding Your IP Address Before you can change your WIFI password you need to find your router's IP Address. The easiest way to find your router's IP Address will be to download the WiFiman App. Once the application has been downloaded; open it and go ...How to change your SSID and Password on the Tenda F3
Step 1: Login the homepage. 1. Open a browser then type “192.168.0.1” into the Address Bar, press Enter. Then enter the password of this page. Tap “Login”. Note: The default password is shown on the bottom of the router. If you have changed it ...Which Third-Party DNS Server Should You Use?
Which Third-Party DNS Server Should You Use? If you want to use a third-party DNS server, some of the best options are the Google Public DNS, Cloudflare, and OpenDNS. Each of these providers has a primary and secondary DNS address that you can use. ...