There are many reasons why you might want to set a static IP address for your Windows 10 PC. In most cases, your router will assign your computer a dynamic IP address, meaning it changes from time to time. This can make it hard to access your computer remotely, use certain programs, and let other users on your network send you files. Here’s how to set a static IP address on your Windows 10 PC.
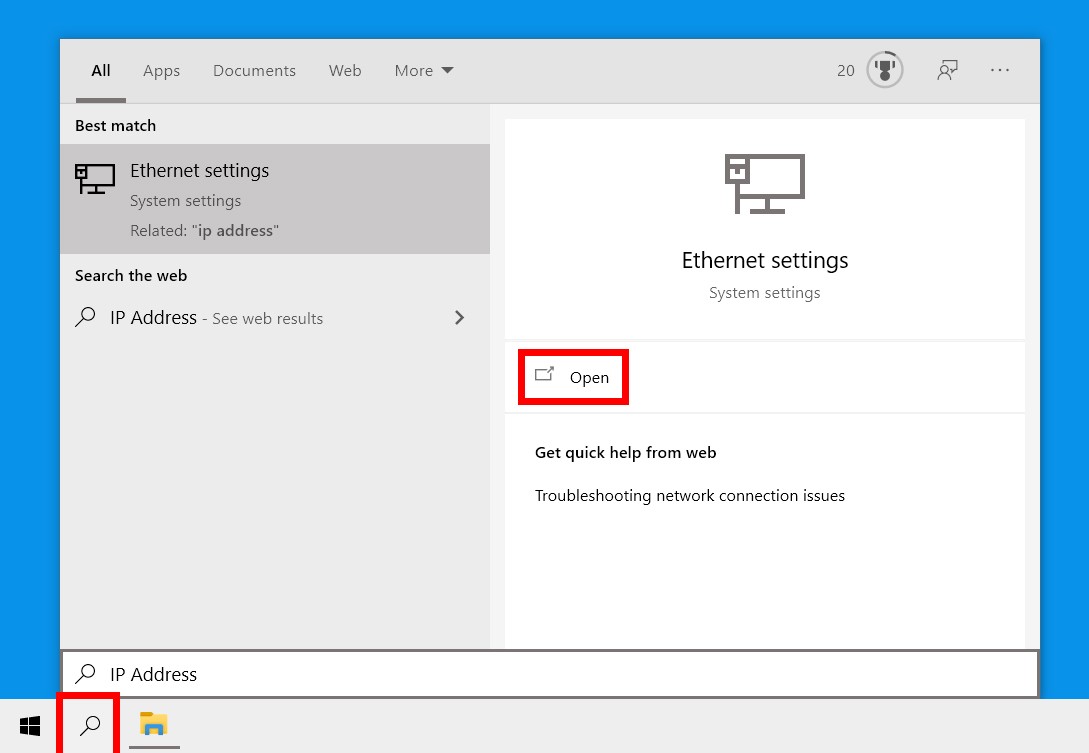
- Click the magnifying glass icon in the bottom-left corner of your screen.
- Then type IP Address into the search bar and click Open. You can also hit Enter on your keyboard if you see Ethernet settings.
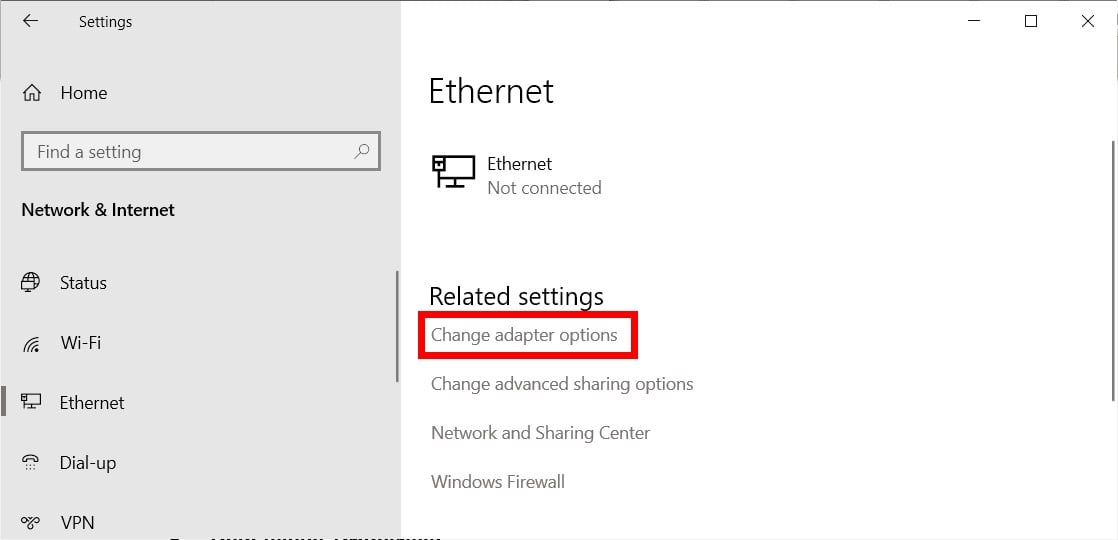
- Then click Change adapter options. You will see this under Related settings. This will open a control panel window.
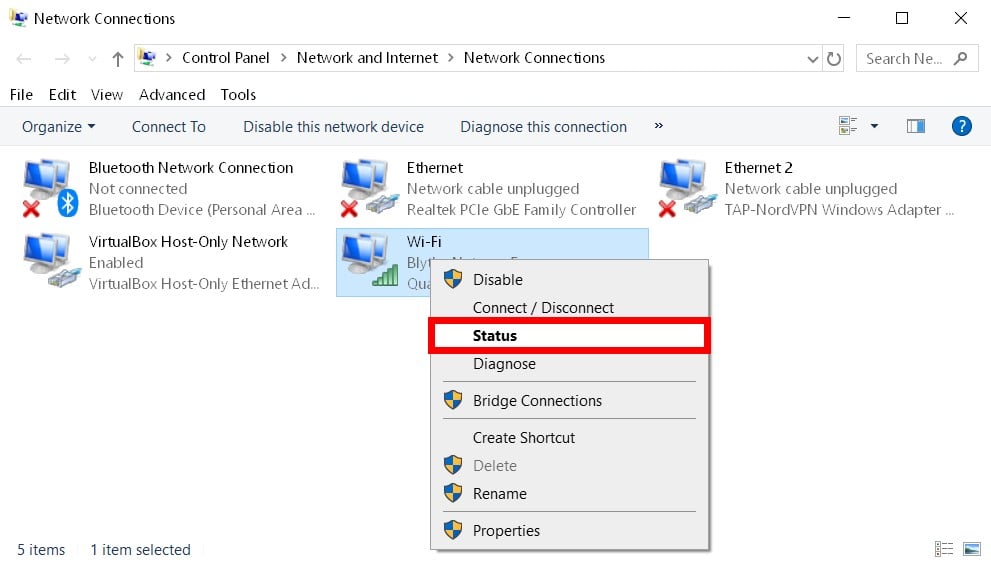
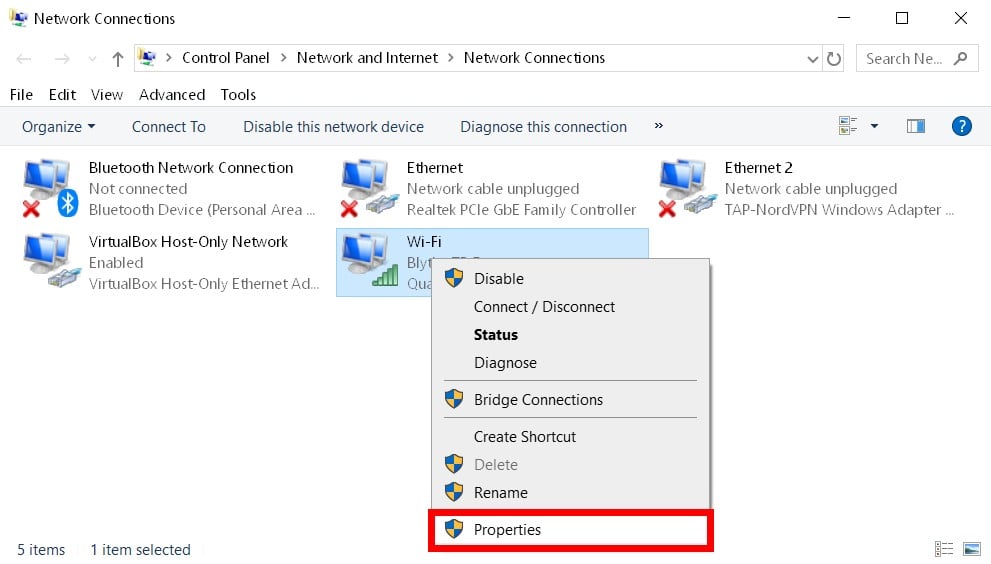
- Next, right-click on WiFi or Ethernet. This will depend on what kind of connection you are using. If your computer is hooked up to your router via an Ethernet cable, right-click that option. If your computer is connected via WiFi, right-click that option. You should be able to tell which adapter you are using by looking at the red Xs and green bars.
- Then select Status.
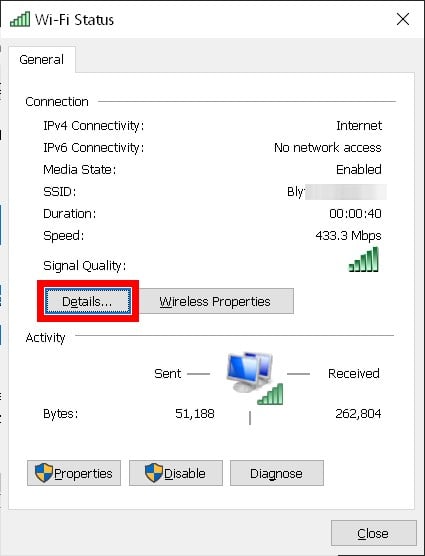
- Next, click Details.
- Then take note of your IPv4 address, IPv4 subnet mask, IPv4 default gateway, and IPv4 DNS server. It is a good idea to write this information down, as you will need it later.

- Then go back to the Network Connections window, right-click your network, and select Properties. You can do this by exiting out of the Network Connection Details and Status windows by clicking the X in the top-right corner.
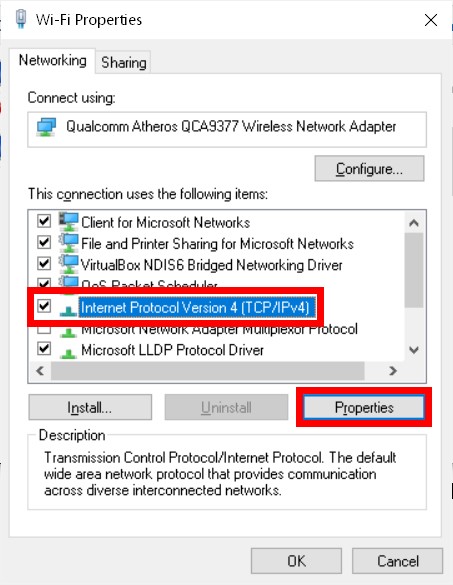
- Next, select Internet Protocol Version 4 (TCP/IPv4) and click Properties.
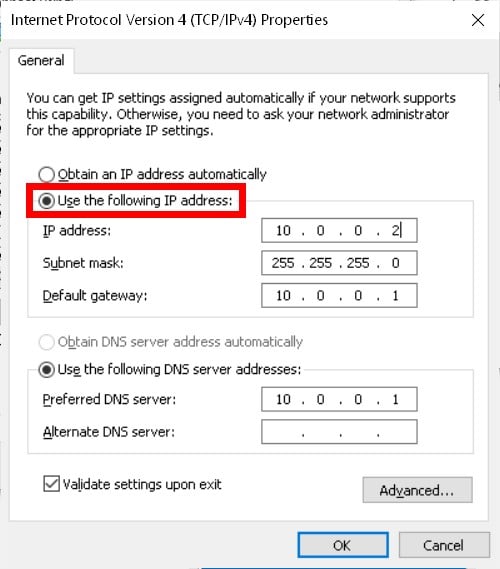
- Then click the radio button next to Use the following IP address.
- Next, enter the static IP address, subnet mask, default gateway, and DNS server you want to use.
- IP Address: Use the first 3 segments of your current IP address. So, if your computer’s IP address is currently 192.168.0.1, you can use any IP address that starts with 192.168.0.X, where X is any number between 1 and 254. Or, if your computer’s IP address is 10.0.0.1, you can use an IP address that starts with 10.0.0.X, where X is any number between 1 and 254. But make sure you don’t set your computer’s IP address to be the same as your router’s IP address.
- Subnet Mask: Usually, on a home network, the subnet mask is 255.255.255.0.
- Default Gateway: This is your router’s IP address, or the IP address of any other gateway, such as an access point
- DNS Server: If you see any numbers already filled in this box, you can use those. If not, you can use the DNS server numbers you saw in the Network Connection Details window. Or you can use Google’s preferred DNS server of 8.8.8.8 and 8.8.4.4.
- Finally, click OK and then close the Properties window. Your changes will not go into effect until you close the WiFi/Ethernet Properties window.